
Intermediate
|
37 min 7 sec
|
01:19
|
|
02:34
|
|
03:16
|
|
09:28
|
|
08:18
|
|
12:17
|

Taught by Jen Hewett
Start Free Trial or
Buy For $19.95
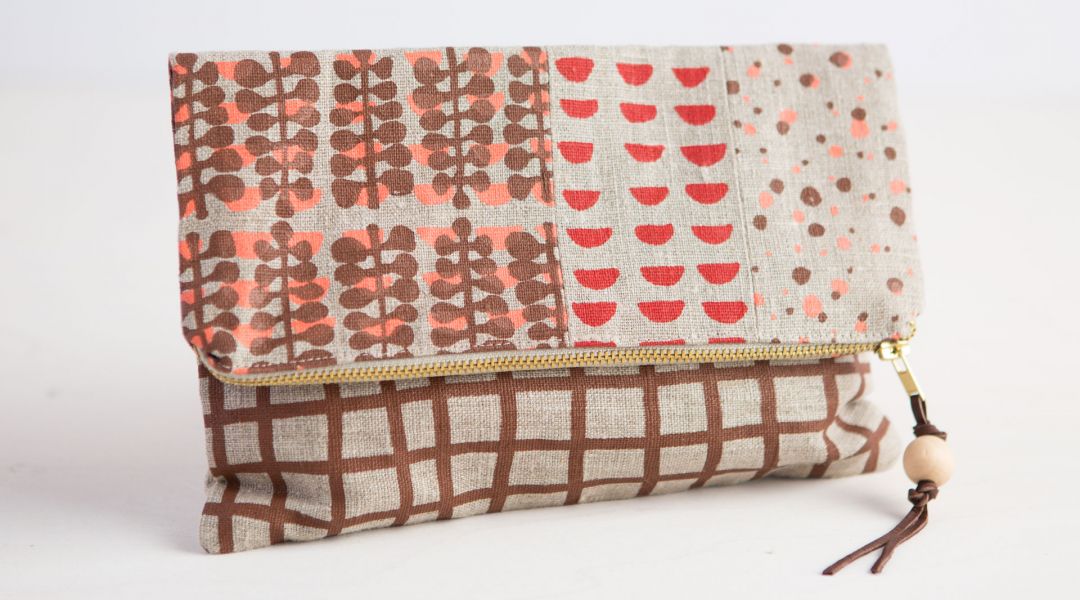
Jen Hewett walks you through the process of screen printing from start to finish, and then shares how to sew a clutch from your custom-printed fabric. You will learn how to make four different print designs on a screen and how to print your fabric using a variety of two-color print combinations. Once you’ve custom-printed your own fabric, take it to the sewing machine to construct a simple, bold clutch using a patchwork technique—a great way to showcase all of your fabric designs on one accessory.
Learn how to:
Here’s what you’ll need:
For Screen Printing:
- Four pieces of 5 ½” x 10” acetate or translucent velum
- One large piece of acetate or translucent velum for print alignment
- 10” print squeegee (or at least the width of your film)
- Rag
- Packing tape
- Masking tape
- Paintbrushes to create your design (Jen uses a few smaller-sized paintbrushes)
- Opaque ink (India Ink and Rapidograph Ink work best)
- Small container for ink
- Fabric printmaking ink in at least three different colors
- Emulsion for screen
- Degreaser and bristle brush to prep new screens
- Muslin for test fabric
- Light-colored fabric for printing (such as medium-weight linen, cotton-linen blend, or quilting cotton), cut into eight 5 ½” x 10” pieces
- Popsicle stick or spatula for stirring ink
- Paint scraper
- Scoop-coater for applying emulsion
- Small screen (Jen uses a 25” x 31” 110 mesh-count screen with a metal frame)
- Batting (large enough to fit under your screen)
- Hinge-clamps to hold screen
- Hose or sink to rinse screen between prints
- For Sewing:
- Printed fabric (eight pieces of 5.5”x10” fabric)
- 9” zipper
- Sewing machine
- Zipper foot for sewing machine
- Coordinating thread
- Muslin for the lining, cut into two 10” x 11” pieces
- Pins
- Rotary cutter
- Snips
- Scissors
- Leather lacing or thin ribbon and decorative bead for the zipper pull (optional)
- Cutting mat
- Quilting ruler
- Iron and ironing surface
Downloads:
- Prepare a screen for silk screening
- Create four designs on acetate
- Transfer designs onto a screen
- Screen-print fabric using four different designs, including a two-color design option
- Cut and sew prints into a patchwork design to sew a clutch
- Insert a zipper
- Insert lining
- Add a zipper pull with a decorative bead
- Detailed instruction on the process of screen printing custom fabric
- 5 HD video lessons you can access online anytime, anywhere
- Detailed supplies list
- Step-by-step expert instruction from Jen Hewett
- The ability to leave comments, ask questions, and interact with other students


Member Gallery
Browse members' projects from this class and share your own work! Learn how to take great photos here.
Load More
Transcript
Class PDF
Screen Print Fabric and Sew a Clutch Reviews
422 users recommended this class to a friend

Sandi H
Once again Jen is easy to understand and follow. I like her tips and techniques. The 2-color screen-printed designs are easiest for beginners and they are very artsy.
More than 3 months ago

ileana Márquez
I do love silk printing! this was a fun and so inspiring class. I want so much to start playing with this technique, hopefully this won´t be so hard to do it at home? Thank you so much for a clear explanation of every step of the process.
More than 3 months ago

Beverly Hilbert
Clever.
More than 3 months ago
Related Classes