All levels
|
10 min 33 sec
|
10:33
|
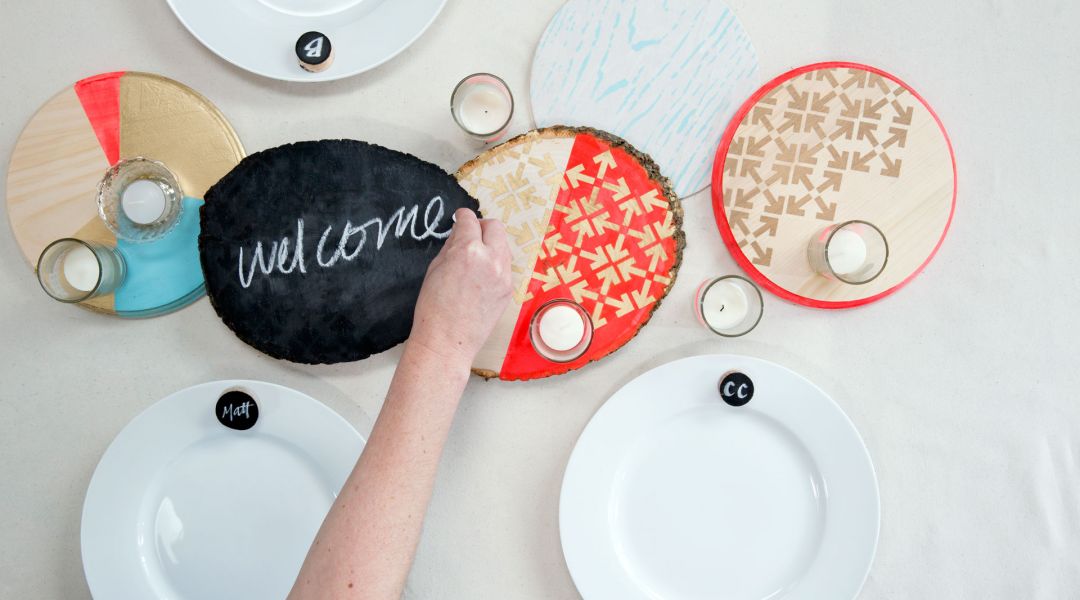
A good tablescape needs an eye-catching centerpiece to draw it together. Courtney demonstrates a variety of ways to paint and stylize wooden rounds that you can lay on your table for a pretty presentation. You will learn how to paint and stencil wooden rounds with spray paint, how to create color block designs, and how to use chalkboard paint and add a seasonal message. Mix and match your centerpieces, then complete your table decorations with coordinated votive candles.
Learn how to:
What you’ll get:
Here’s what you’ll need:
- Wooden plaque or round
- Spray paint in a variety of colors
- Stencil
- Scrap paper
- Repositionable spray mount
- Craft paint in a variety of colors
- Brushes in a variety of sizes
- Gloves
- Optional:
- Chalkboard paint
- Chalk marker
- Chalk
- Votives
- Washi tape
Downloads:
- Paint wooden round with spray paint and stencil
- Color block wooden round
- Paint wooden round with chalkboard paint and add message
- Decorate votives with washi tape
What you’ll get:
- 1 HD video lesson you can access online anytime, anywhere
- Detailed supply list
- Step-by-step instruction by expert instructor Courtney Cerruti
- The ability to leave comments, ask questions, and interact with other students


Member Gallery
Browse members' projects from this class and share your own work! Learn how to take great photos here.
Load More
Transcript
Class PDF
Painted Wooden Centerpiece Reviews
135 users recommended this class to a friend
Anne Gurnee
Such fun ideas! Great for holidays or other special celebrations.
More than 3 months ago
Shiri DH
This was the first CreativeBug project I ever made! The simplicity of the project inspired me to move past passive viewing to actually crafting. I had a beautiful wooden round from a local (and famous!) deceased maple tree. Now I have a beautiful centerpiece which I display on my zoom background. 5/5 Highly recommend.
More than 3 months ago


